

How To Repair Tile In Bathroom Wall
Can you pigment tile floors? Yeah! I'g sharing how painting our bathroom's ceramic tile floors – a elementary, inexpensive DIY – made a HUGE departure!
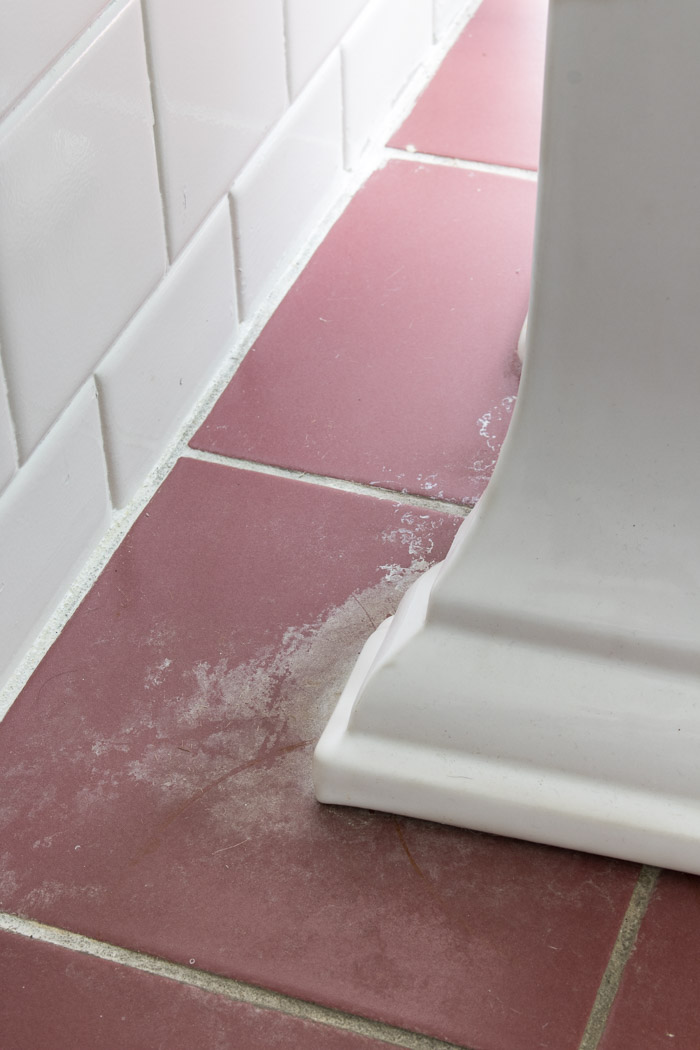
Do you ever accept a projection that ended up being then much easier than you lot expected that you're kicking yourself for procrastinating so long to practice it? Painting the ceramic tile floors in our offset floor bathroom was one of those projects for me! I decided I was going to pigment my bath floors way dorsum in 2022 when I was making over my space for the One Room Challenge only the stenciling of the bathroom walls took then long that I ran out of time to do it before my big reveal. Somehow Three full years went by with me giving the stink eye to those floors every time I used the bathroom but doing nothing about it. Well I finally knocked this niggling DIY projection out and it was so cheap and like shooting fish in a barrel. And I love it! Welcome to my its-five-hundred-times-better-than-those-ugly-reddish-floors-were bathroom!
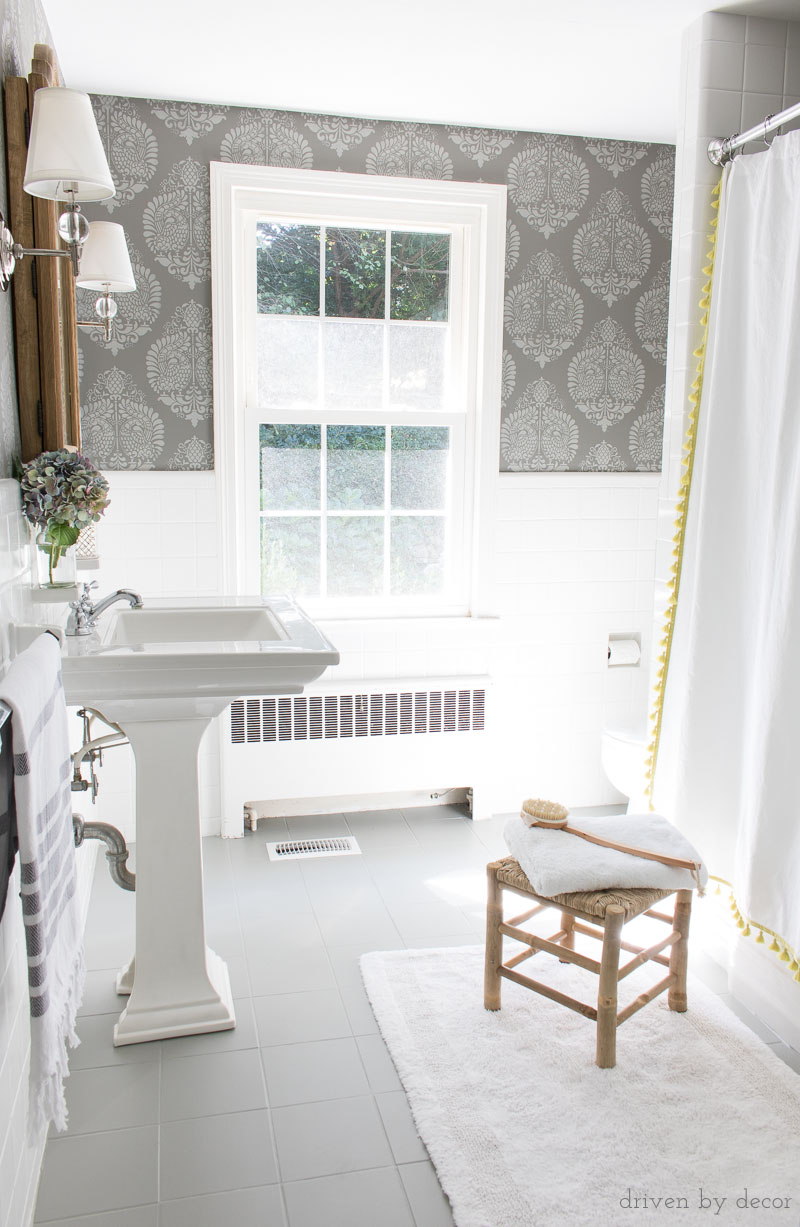
Such a HUGE improvement over the reddish tile, right?!

And believe information technology or not, the ugly color wasn't even the worst thing about the old tile floors. Backside both the sink and the toilet, the tile had gross, ugly stains that I couldn't become off no affair how hard I tried – completely gagworthy and something the previous owners hid under a custom cut rug they had in this bathroom when we bought the house!
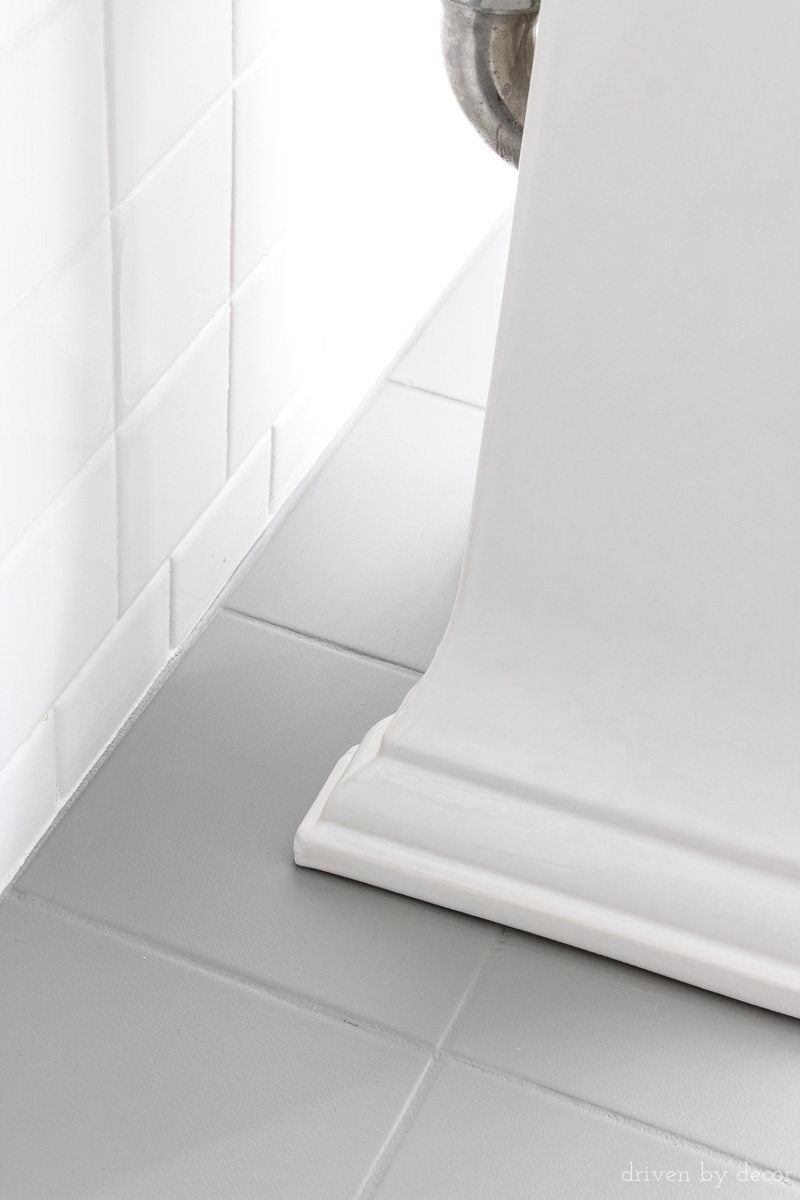
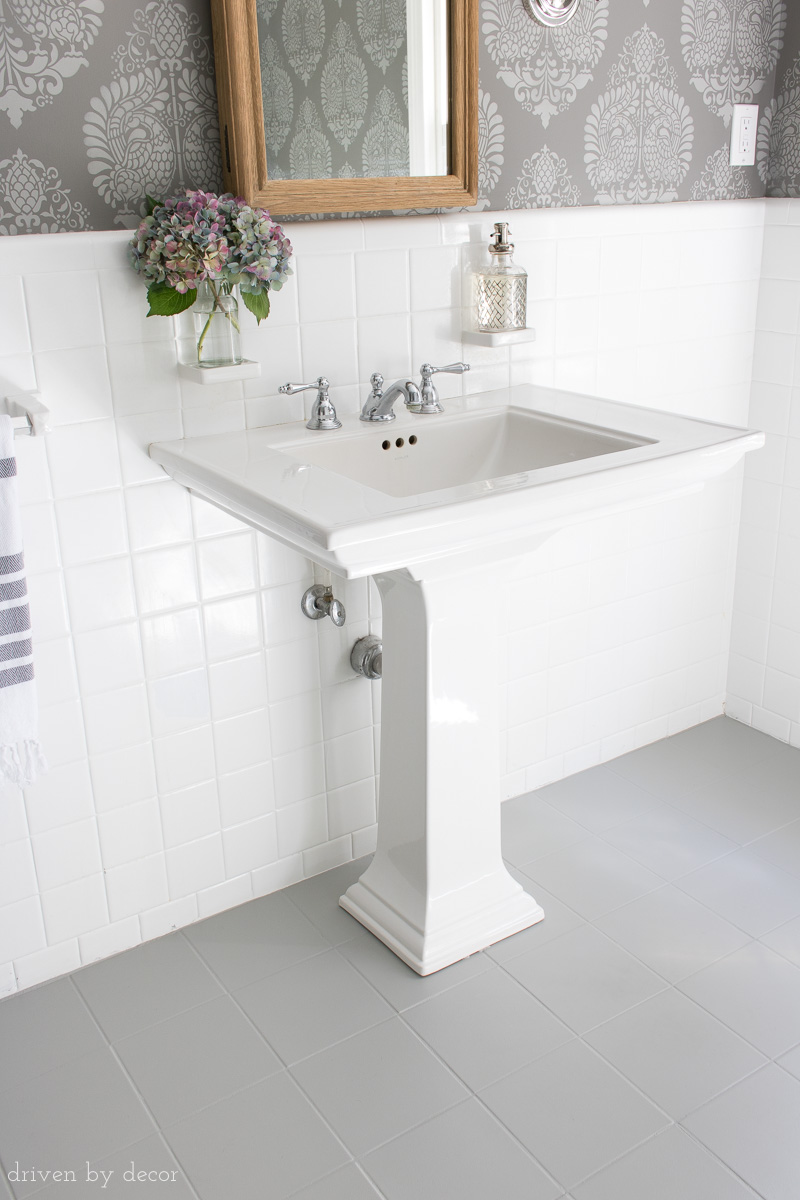
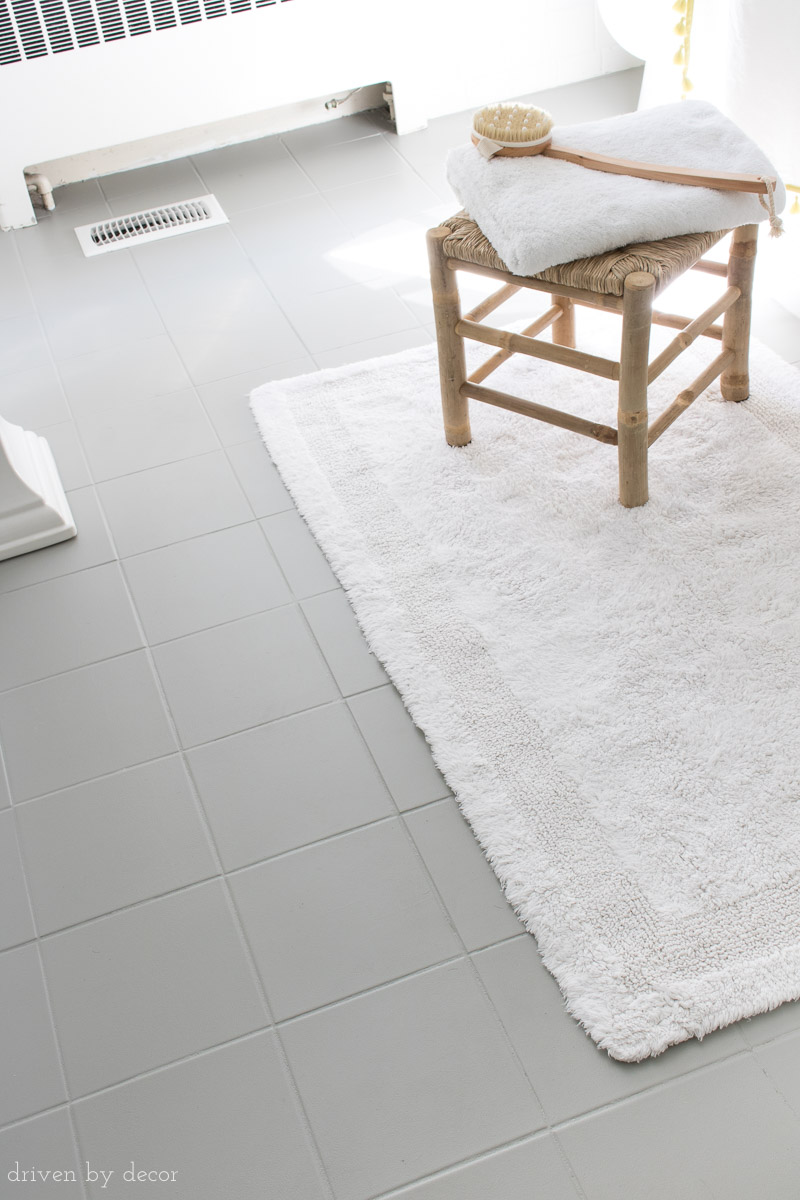
Now you'd never know that my poor tile had such an ugly past!
Hither's what I did to go the job done (affiliate links included in mail – full disclosure argument bachelor {here}):
Step one: Sanded My Tile Floors
Sanding the tile helps helps scuff upwardly the surface of it to help the primer attach. And I was able to sand right off the disgusting unidentified crap on the surface of my tile. The purpose is not to remove the glaze on the tile – it'due south just to scuff it upwardly. Notation that ceramic tile can contain pb so consider testing for it or consulting with a professional if yous're unsure well-nigh your tile. Always use protective eyewear and an advisable mask or respirator to foreclose you from breathing in the sanding dust. Comprise the dust so it doesn't become into other areas of the house.
I used {this electric sander} which makes the job so much quicker and easier than doing information technology by hand. If you do a lot of projects around the house and don't already have one of these electrical sanders, I'd highly recommend information technology – it'south lightweight, fits in the palm of your hand, and has an angled head to become into corners easily:
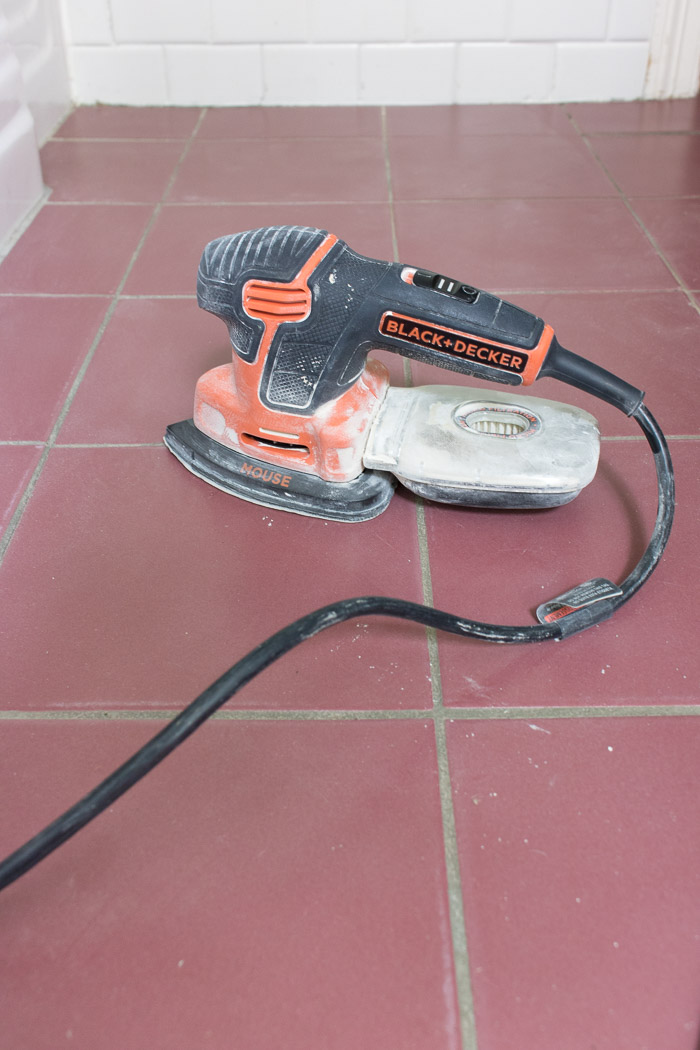
I sanded the tiles that had a build-upwards of crud on them with 80 grit, did the whole floor with 120 dust, and so finished off with a quick once-over with a fine 240 grit.
Pace ii: Clean Your Floors (Super Well!)
After finishing sanding, I vacuumed upward all of the dust and debris and so went to town on cleaning my floors. Any heavy-duty stripper & cleaner should do the job – y'all can go the one that I used online {here}.
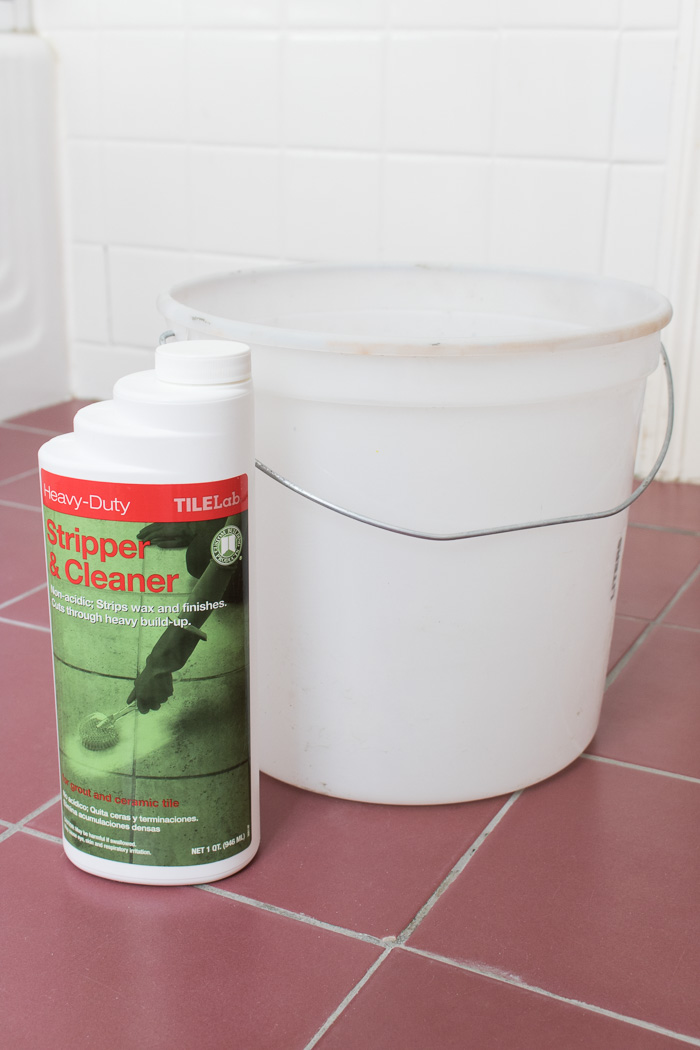
I mixed the cleaner with water (per the instructions), mopped it onto the flooring, let it sit down for about 15 minutes, and so scrubbed the entire flooring with a nylon scrub brush. And then I cleaned it off with bucket of warm water and did it a second fourth dimension. The cleaner the flooring, the amend your pigment will adhere!
Step iii: Repair any Missing Grout or Cracked Tiles
The grout on our flooring was a mess and at that place are several areas where chunks of it were missing. Regrouting is a pretty huge job since you need to spend a lot of fourth dimension earthworks out the old grout get-go so I went the easy route and simply used paintable caulk to fill in and smoothen over any bare spots in my grout. The caulk adhered well and now that information technology's painted, you would never know that I had washed it. Now would exist the time to replace or repair any cracked tiles too. I had 1 tile closer to our bathtub with a crack in it just knew it would be covered by our bathroom rug and then I simply caulked the cracked portion and sanded downwardly the rough edge a flake instead of replacing it.
Step iv: Employ a Good Primer
Using a actually good primer is the cardinal to success for painting ceramic tile! I used INSL-X STIX (available {hither}) which is my go-to primer for painting surfaces that paint might normally have a hard time adhering too (you might call up that I used it to prime brass shelving strips on the inside of the bookcase when I made-over our family unit room). I used a pigment brush and small roller simultaneously (I employ a 1/4 inch mini roller similar {these}), painting the edges and grout lines with my brush and so rolling on the primer for the rest. But make certain yous commencement at the far stop of the room and work towards the door so you don't pigment yourself into a corner. Once it was dry, I recoated using the same technique.
Pace v: Paint Your Tile!
I painted our floor tile in the same way every bit I primed it, using a paint brush on the edges and on the grout and rollering the rest as I went (every bit with the primer, I used a 1/4 inch mini roller like {these}):
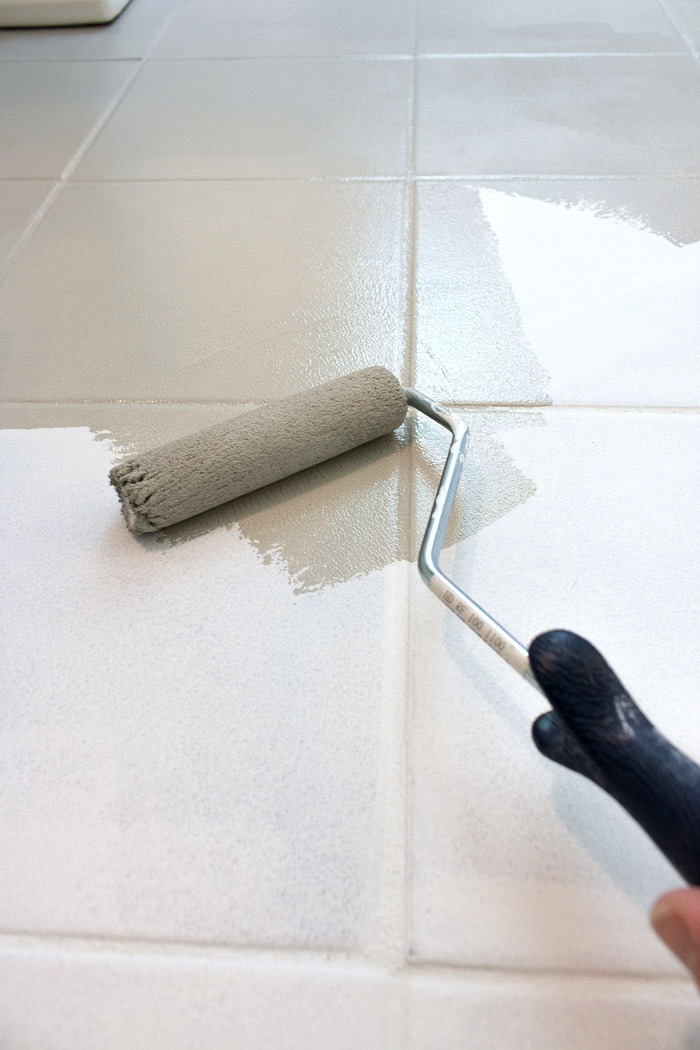
The type of paint that I used was Benjamin Moore's Floor & Patio Paint since it's meant to stand to lots of utilise and corruption. It comes in High Sheen and Low Sheen options – I chose Low Sheen simply for personal preference. I practical iii coats of paint, letting information technology dry out co-ordinate to the paint instructions in between coats. The color I went with is Benjamin Moore Platinum Gray, which is the aforementioned gray color equally the lighter portions of my stenciled walls.
Step 6: Seal Your Tile?
The last step if you lot cull to do information technology, is to seal your tile. I was definitely torn on whether to seal mine – with porch pigment you technically don't need to seal it since the paint is made to withstand a lot of wearable just sealing information technology with a polyurethane would definitely make painted tile more durable. The only negative to using polyurethane is that if you practice get a gash in your flooring or some other area that needs to be repaired, it's a little trickier to fix in a fashion that it blends in perfectly if you've topcoated with polyurethane. So for at present, my floors are going topless (and afterwards being used for several months have held upwards really well) merely if your floors go lots of wear and tear, a topcoat of polyurethane is definitely something I'd think about.
Step 7: Let Your Flooring Dry & Then Put It To Use!
After your concluding coat of paint or polyurethane, requite your floor at to the lowest degree a couple of days to fully dry earlier walking on it (the more humid it is, the longer it will have) – it's best to be gentle with it (no heeled shoes, etc.) for the outset week or two until everything is fully cured. Nosotros've been back to using our bathroom normally for a few months now and the painted tile has held upward beautifully! The only outcome I've had is a small only deep scratch on one of the tiles that was plain made by something precipitous – I'1000 guessing a pocket-size rock that got stuck in someone's shoe tread. I was able to sand it and repaint just that one tile and now you lot'd never know anything was once in that location. So overall, I'thousand incredibly happy with how it looks and how it'southward worn! Especially for a projection that cost me under $fifty!
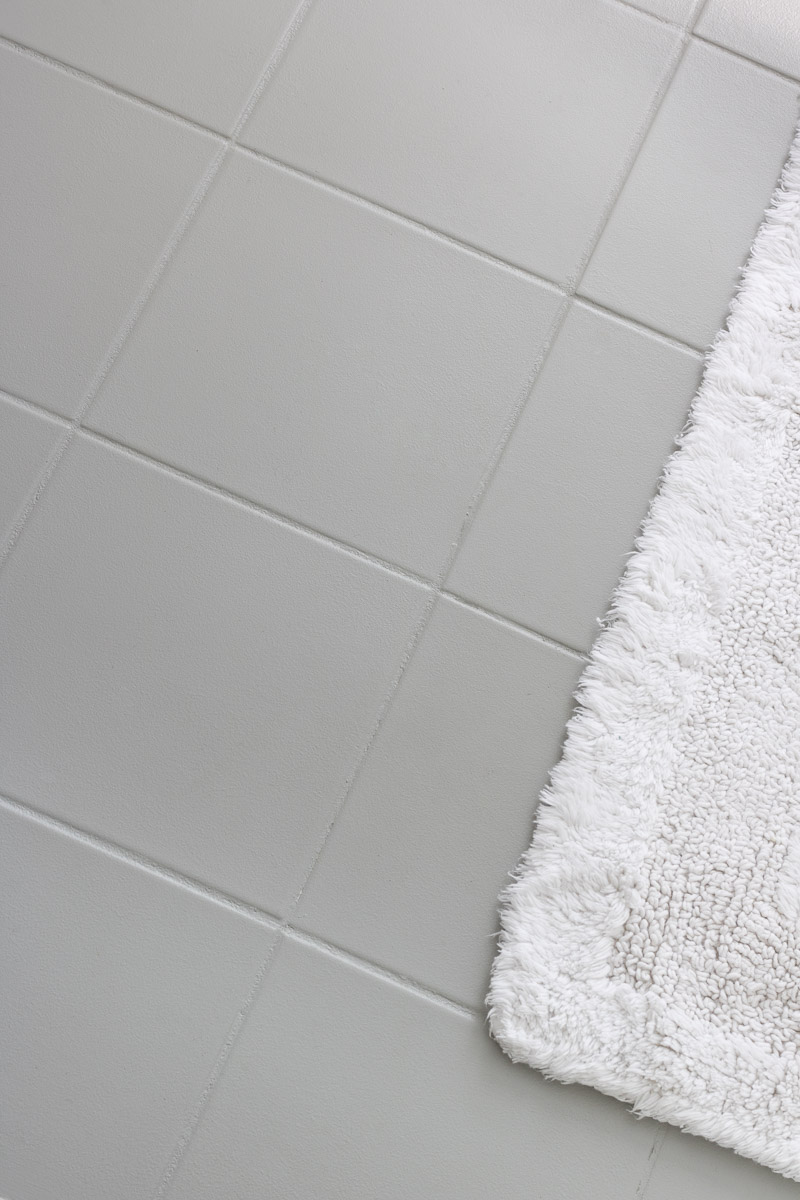
The one other small-scale change I made in this space is replacing the large jute carpeting that used to exist in here with a big xxx″ x 50″ white bathroom mat. Have I been living nether a stone not knowing that they made bathmats that are long and narrow like this then that they bridge almost the whole width of the tub? I sooo needed one of these when my kids were piffling! I've already ordered another i for my daughters' bathroom – in addition to being a dandy length it'south then super cozy on your feet and I love the subtle border pattern!
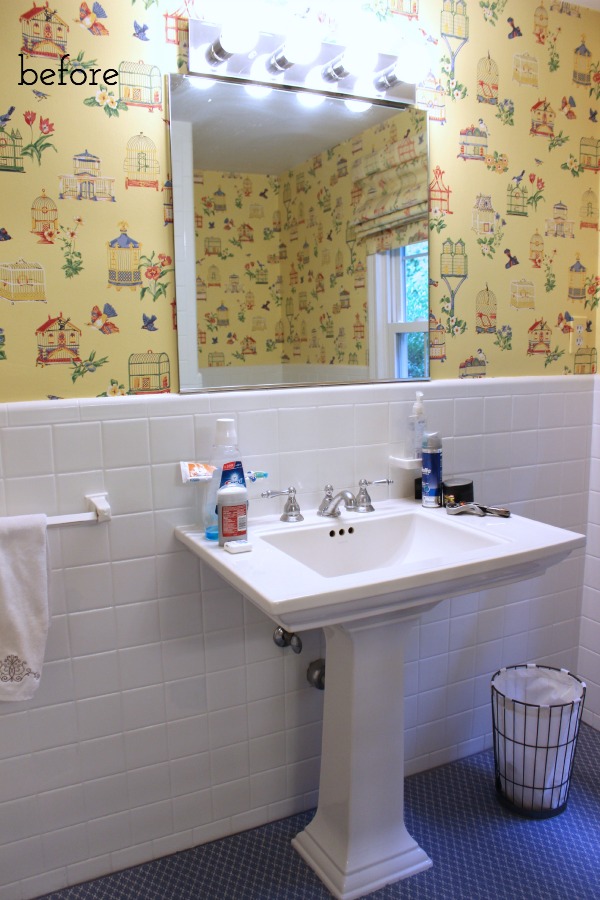
So I tin finally write our bathroom off equally one more room that's washed… for now at least 🙂 Just to see how far it's come, this is what our bath looked like when we moved in (this is earlier we took out the rug because I decided that even the ugliest tile is better than a rug that goes around the toilet – yuck!):
and here it is today:
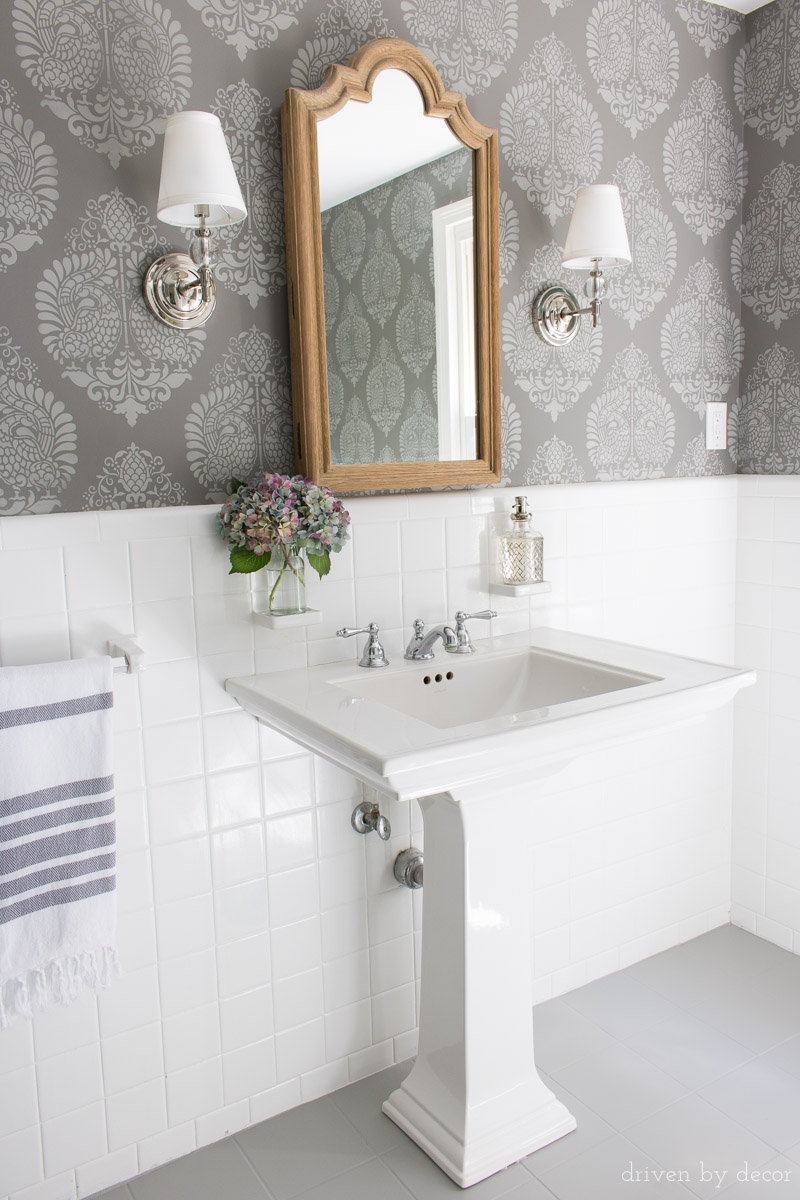
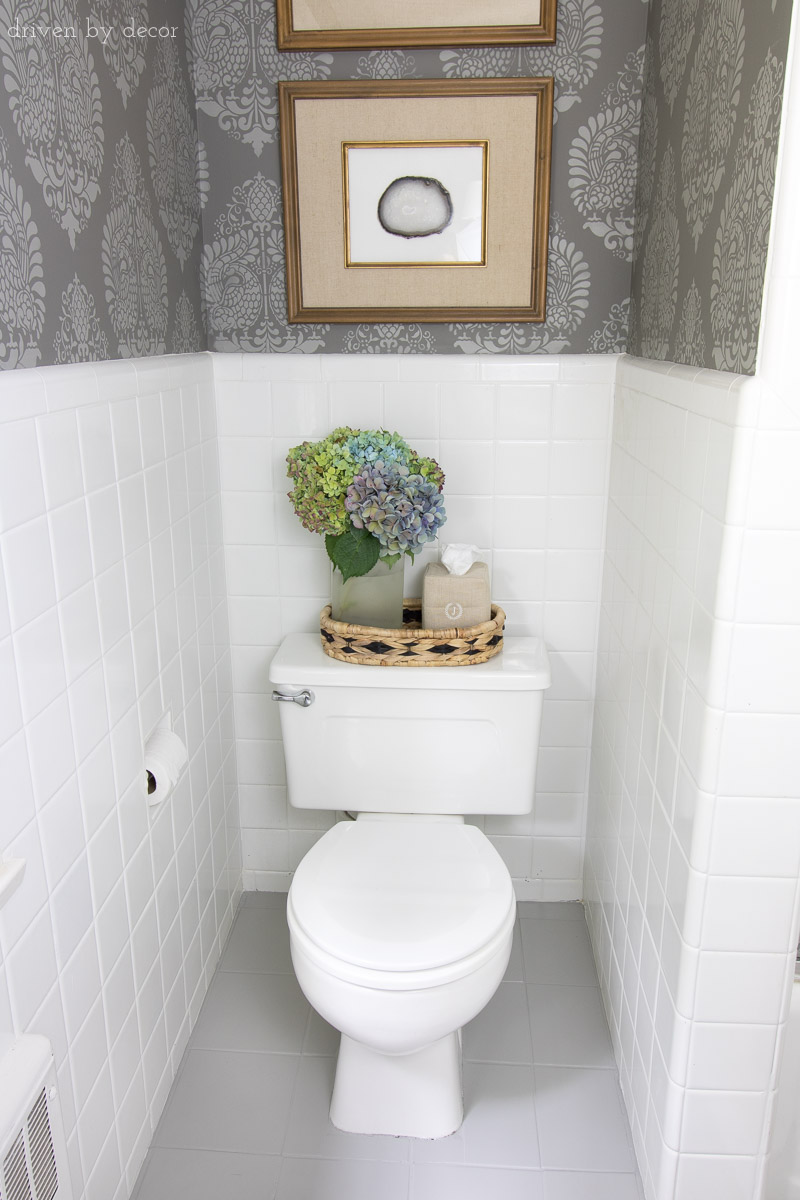
The best role is that information technology's a room we didn't spend a ton of money on. Other than the money spent on the wood medicine cabinet and sconces, everything else was inexpensive DIY projects. You can read more than near how I stenciled the walls to look like wallpaper in {this post}, how I reworked our ancient towel bar in {this post}, and about the DIY art that I added over the toilet in {this post}.
So what do you lot call back? I've included a total source list for my space beneath in case you were wondering where something in my bathroom came from – hope it's helpful!
UPDATE!! If y'all're wondering how our painted tile floors have held up check out {this mail} with an update of how they're looking 20 months later!
Thanks for stopping past!


Curlicue and Click/Tap to Shop the Look! Source details as well linked below

Wall Stencil & Paint Colors: Annapakshi Indian Damask Wall Stencil – I used the 11.25″ x 15.5″ furniture stencil (Basecoat pigment: Benjamin Moore Aura Bath & Spa (Matte) in Chelsea Grayness; Stencil pigment: Platinum Gray (Benjamin Moore color only mixed in Behr Premium Plus Ultra in Satin)
Primary Pieces:Pedestal Sink | Medicine cabinet is no longer available simply {this arched wood mirror} is a very similar blueprint
Accessories: Sconces | Tassel Shower Curtain – {this shower curtain} is similar and a better price | Bath mat (30 x 50) – no longer available | Lather dispenser – found at HomeGoods but {this clear dispenser} is similar | Woven handbasket on toilet – HomeGoods | Wood stool: HomeGoods (I love {these dip dyed stools} as an alternative! | Frames above toilet – no longer available | Monogrammed tissue Box Cover | Turkish Bath Towel (greyness/white)

Source: https://www.drivenbydecor.com/how-painting-bathrooms-ceramic-tile-floors-diy/
Posted by: hepnerthemannind.blogspot.com
0 Response to "How To Repair Tile In Bathroom Wall"
Post a Comment